Tuesday, December 20, 2011

Now You See [Through] It, Now You Don't

Our front door has a large window in it (it takes up about half of the door). It is great for letting in light to the entry, but not the best for privacy. From the front porch you could see all the way through the hall and kitchen to the back of the house. So to solve the privacy problem, I frosted the window.

But just solid frosting is boring. So I wanted to bring a little clear glass into the design. We decided to go with an outline to sort of mimic the stain glass window next to the door. We also thought it would be nice to incorporate something such as "welcome" or the house number. Well, since the house number is on the front of the house twice already (under the stain glass window above the mailbox and also on the porch light), we went with "Welcome".

The process started by taping out the design we wanted to stay clear. I used blue painters tape for the outline and contact paper for the welcome part. Once the writing was on level, I had the tedious task of cutting out each letter.


After plastic-ing around the door, I used a spray paint froster (Krylon Frosted Glass Finish). It went on a little spotty after the first coat. But after a second and real light third it evened out.


And the finished product:


Edit: By request, here is the door from the outside!


Friday, December 9, 2011

Backsplash Bonanza

We finally have a backsplash! It was a decently long process, but well worth it. We decided to go with something a little different from the traditional tile and went with "tin" tile (it was actually a plastic, making it easier to work with).

The first step was to prime the tiles (two coats) so the paint would hold and not peel off when wiped down.


Then two coats of cream colored paint.


We then sanded them down to give them a bit of an old, distressed look.


Installing them was super easy. They cut with just a pair of scissors and went up in no time.


We love how it turned out! Unique and unexpected, but looks great! And it was definitely an easy DIY project for anyone, no matter how handy (or unhandy). So hopefully we can inspire others to think about a tin backsplash instead of typical tile... maybe?

Sunday, December 4, 2011

It's Beginning To Look A Lot Like Christmas

Over the last couple weeks, we picked up some more Christmas decorations. Some stockings, a wreath, some ribbon (to add to the wreath), greenery for the porch steps, and lights for outside.

The stockings we hung on our stair rail. We don't have a fireplace to hang them from the mantle, but we think they fit perfectly on the stairs. And yes we got three (cause the spoiled puppy has to have one too).


We bought four pots for the stairs to our porch months ago for flowers. Well its been a tad cold for flowers since we moved in, so they've been empty. And just looked a bit sad. So a trip to Joann later and we had some faux greenery (yes faux... its too cold for much else to last outside through the winter and this way we have for next year too). I ended up cutting all of the stems and redoing arrangements to make them look a bit fuller in the pots. And now the pots don't look so sad on the steps.


And our wreath. I had these grand plans of making my own with pipe insulation and burlap and ribbon. I even had everything in my cart shopping except the burlap when I found a pre-made wreath. It's not burlap but I thought it was amazing and had to have it instead. So back went the pipe insulation. But I kept the ribbon to add to the pre-made wreath to give it a bit more oomph. Using the clever trick of an upside down 3M hook on the inside of the door, the wreath hangs outside and looks amazing.


To top off the Christmas decor, Kevin also hung some lights in the front windows and around the porch area. With all the decorations and a little gift shopping this weekend, we're definitely feeling the holiday spirit!


Thursday, December 1, 2011

Let There Be Light

We replaced almost every light in the house with new, slightly more modern ones. Partly because they were just a tad ugly (in our opinions). But also because they were quite old and the wiring was a tad shoddy. The only one we kept was the dining room. Not because we really liked it. But because I had this crazy idea of spray painting it (props to Pinterest, where I spend way too much of my very little free time).

So the longer than expected process began.

Since we weren't figuring we'd need to take the light down for anything, I built a ridiculous spray painting shelter around the chandelier. It involved hanging plastic from the ceiling around 3 sides of the chandelier, a drop cloth on the table below, and more plastic on the front open side below the chandelier. I taped over the chain and wiring so that didn't get sprayed and removed all of the hanging crystals.


Then came one coat of primer and two coats of color. And some new shades. Everything was looking great to put the chandelier back together.


Except then Kevin noticed some of the wires were fraying. As he looked further, more and more of the wiring was shot (probably why we didn't use most of the other light fixtures in the house). So he then had the fun task of rewiring the light. And my shelter idea to not have to take down the chandelier was kind of ruined. Not only did we have to take it down, but it was disassembled into pieces. But hey at least we know the wiring is safe.


To top off the new look, we got new shades. It looks like a completely different chandelier!


Monday, November 28, 2011

Hang Up Your Coat And Stay A While

So we (or more so I) have had some crazy ideas for decor and repurposing stuff around the house. We had this dresser in the master bedroom closet that just didn't work. The drawers didn't slide and it just was taking up a ton of space. So when redoing the closet, we pulled it out. And it was then I came up with an idea to reuse the drawer fronts for a coat rack.

First step was to get the drawer fronts detached from the rest of the drawer. Luckily with a couple hits of the hammer, they popped right off. Then hooks were attached.


The original plan was to hang them on the wall with plugs for strength. But the plaster walls and my plugs didn't seem to want to get along this time. So after some nice holes were put in the wall, plan A was scrapped.

Plan B consisted of attaching a board to the wall with toggle bolts then attaching the drawer fronts to that board. I attached all five drawer fronts together with a couple boards to make it easier to hang and level. Note to self for the future: Menards has a crappy (non-existant) lumber department (normally I would have gone to Home Depot, but I was already at Menards because they have a better lighting department).


With a little decorating of the table top, the entryway is almost complete. Just need a rug and to frost the window on the door and we should be set. Maybe a little paint later on.

Saturday, November 26, 2011

Holiday Happenings

I hope everyone had a happy Thanksgiving! And a relaxing day after (for all of the non Black Friday shoppers). Ours was wonderful. We decided this year to divide the holidays between our two families (alternating each year) so we could spend more time with each family and be able to relax a bit more. Holidays were a bit stressful trying to make it to two different dinners on the same day and (for me) an abundance of baking. So, this year, Thanksgiving was with my family and Christmas will be with Kevin's.

As usual, I had the task of baking for dessert. Pies are the traditional choice. Last year I made them in cupcake tins so they were individually portioned. They turned out great, with one problem. People wanted to try multiple varieties so we were cutting them in half. So this year I decided to make them even smaller. Using mini muffin tins. And created bite sized pies. They worked out perfectly! People were able to have multiple flavors with no cutting.


The day after, we spent relaxing. I also got some of our holiday decorations up (well all of the decorations we have so far). Our little tree was put up and decorated. A couple holiday candles pulled out. And the menorah set in the window next to the tree.


Being the first Christmas in our house, we don't have any lights yet (but we plan to pick some up for Kevin to hang on the house). I also plan on making a wreath for the front door and possibly picking up some small evergreen plants for the pots on the stairs to the porch.

And since it's been a while since the last post (sorry!), last weekend we got a few things taken care of. We made our weekly Home Depot trip and picked up the tin tiles that will be our kitchen backsplash. They are currently in the process of being painted (and then distressed). Hopefully we can get those finished and installed soon. We also painted a base coat of white in our bathroom. Plans are to stencil or get some sort of pattern/design in a color over the white.

With the long weekend, we're hoping to get a good bit more done around the house. It's starting to come together, but there is still so much to do. And I will try to start posting more often again (sometimes we just get busy...)

Thursday, November 17, 2011

Through The Looking Glass

A couple weeks ago we ordered new windows. Since we have an old house there are a LOT of windows. Something along the lines of 38 on just the first and second floors (add around another dozen for the basement as well). Two were replaced during the bathroom construction. But that still leaves 36 old, drafty, noisy, warped, broken windows that need replacing.

So we started with 16. We went for windows that were in the worst shape and in rooms where we would be most. The living room was top priority since there were eight original windows that were warped and all sorts of a mess. The two in the dining room finished off the first floor windows (chosen because they were original like the living room, the dining room is open to the living room, and one window was cracked). And then 6 windows on the second floor. Two in the master bedroom to help keep it warmer and quieter while we sleep. Then one each in the stairwell, closet, and each additional bedroom. And since multiple of those were broken (one was at one point being held up by a hanger), they seemed like a logical choice to replace in the first round (even tho the extra bedrooms probably wont be used very often).


We opted for vinyl instead of wood. They were less expensive and much less maintenance. And with 36 windows, those were both huge factors. Though we did want to keep with the character of the house as much as possible. So we went with wood look on the interior. While we don't have the option to stain them to perfectly match every variation in the trim work (because no two rooms are exactly the same), they match good enough in our opinion. The living room actually matches nearly perfectly. We also got grids for the living room and master bedroom windows (the ones in the front of the house) to try to stay true to the age of the house.


We already notice a difference from the old windows. The house is so much quieter and warmer. At least in the rooms with the new windows.

And in case you didn't know, children can't fly. At least outside of their imaginations.

Monday, November 14, 2011

Gray Matters

Over the course of the week, (post work) we dyed the curtains from the living room. Taking them from white to a light gray color. They have a little more of a contemporary touch to them. But still feel vintage-y with the sheer design. They are also a little less prominent against the windows.


Though we realized that the curtains were a bit too wide. So we recruited my mom to cut (and sew) them down a bit. I would post a picture, but someone sewed the casings closed so we can't hang them yet.

We also asked our wonderful, personal seamstress to recover a couple pillows. There are many more pillow projects on the horizon. But this was a simple recovering so they would match our new bedroom color scheme (or what will be our new color scheme once we paint and such).

Today our glass shower enclosure was installed. It looks so good that it even inspired my mom to replace theirs with a similar enclosure. It needs to set for 24-48 hours. But after that time we will be able to use our master shower finally!


Kevin also picked up our over the toilet storage. But we decided since we were having people in the bathroom today to wait until they were finished to install it. Hopefully we can get that up one night this week so I can organize our bathroom stuff already.

As the renovation projects are winding down, the decorating projects are just beginning. The next of those on the list is painting. But don't worry, we have plenty more reno projects in the near future. First up is revamping the downstairs bathroom to be a half bath/laundry room combo. I'm already over having to go down to the basement to do laundry.

We're getting close to being able to post some final after pictures!

Sunday, November 6, 2011

There's Never Enough Time In The Day

Even with an extra hour, the weekends never seem to be long enough to get done everything I want to do. But nevertheless, we did make some good progress on the house.

Friday night we got a little work done. I put together the two over the door shoe racks in order to let the 3M sticky tape take full hold to the doors before unpacking shoes. I'm hoping this week I can get all the shoes unpacked.


Saturday we didn't do much on the house since we had Porkfest 2011 to go to (my coworkers and families/significant others got together for the evening and lots of food). I spent the morning baking cupcakes for it too. French toast with maple buttercream and bacon.


We stopped at Ikea on our way. Which is one thing I will never do again. Ikea on a Saturday afternoon. Definitely going up there with worst decisions of my life. So many people. But we ended up getting what we needed. A couple rugs for the bedroom (so little puppy nails on the wood floor wont keep us up all night), a couple more brackets for the shelves in the giant closet (apparently a couple got misplaced since we ended up with two extra shelves), some fun canisters for Kevin's coffee so it looks nicer on the kitchen shelf, a glass shelf for over the sink in the master bathroom (for things like soap and toothbrushes and what not), a trash can for the second upstairs bathroom, and some pretty smelling candles (cause I couldn't resist).


Sunday has been a busy day. We started the day with errands. Home Depot, Joann Fabrics, and Menards. Home Depot was the first stop. We picked up some electrical stuff so Kevin could get the cable and ethernet hooked up and running properly. We also got accessories for the master bath. Toilet paper holder, hand towel holder, etc. And yard bags. More on those to come.
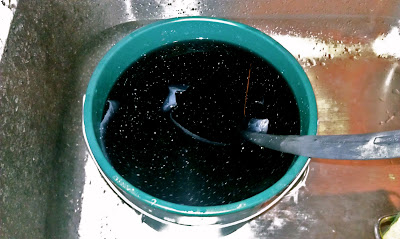
Joann Fabrics was to get dye for the living room curtains. I mentioned in an earlier post about how they were white and I may dye them. Well turns out they look a little too antique-y and old while white. So we're going to try a nice pearl grey to see how that looks.


Then the last stop of the day, Menards. Here we got accessories for the second bath upstairs. A free standing toilet paper holder and a hand towel hook. And got a toilet topper storage ordered for the master bathroom. The website lied to me and said it was in stock in store. But it should be in within the week, so we can just get it up next weekend.

So back to those yard bags. After cleaning and putting up most of the Ikea/Home Depot/Menards stuff, we went outside. Originally the thought was to just rake up the coating of leaves on our yard. But then somehow changed to also starting to clean up the plants that are taking over. So we started back by the parking pad. Between the leaves and the plant mess, we filled 8 yard bags. Yes those big brown paper ones. And we barely made a dent in the plants that need to be brought back under control. We decided though that with how out of control everything is, it would just be easiest to cut everything back completely and start fresh with new plants come spring. We have 7 more (empty) bags. And I'm sure will fill them all (and possibly more) cleaning up the rest of the plants. But our yard already looks better and bigger!


Of course a little cleaning and laundry got done as well so we don't get too behind with that. Hopefully this week (weather permitting) we can make some more headway on the mess that are the plants in our yard. Have to get to that before it gets too terribly cold (and before yard waste pickup stops). Also hoping to get the curtains dyed one night. Once the storage unit for the bathroom comes in we can finish putting together the bathroom as well. Things seem to be coming together finally. As we sit and wait for the contractor to finish their stuff. But even once all of that is done, we still have a long list of project ideas.

And thanks to everyone who has donated to the Love&Reno-vation Fund so far!

Tuesday, November 1, 2011

Happy Housework And Halloween!

Another weekend, some more house work. And it's starting to finally look like we're not still in the moving process. Because most of the boxes are finally unpacked. Things aren't all quite in their final places, but at least they're out of boxes.

With the sewing (and ironing) help of my mother, we got curtains hemmed. I probably could have done a few since wonderful Ikea sells theirs with hem tape. But the ones that involved actual sewing, not so much. I also got some new blinds hung in the master bedroom (since the old roller shades were broken). The blinds were just a tad more difficult than they should have been since they were about 1/4 of an inch too wide for the space. Though after a little manipulation, we got them to fit.


And those shelves I bought almost two months ago, finally went up. And the unpacking and organizing the closet has begun. There is still a bit of stuff left to unpack. And I will probably rearrange everything a dozen times until I find the way I like it. But it's progress.


Speaking of closets, I also got the hanging bars up in the master closet. Which then allowed me to unpack the rest of the clothes. Yay for no more living out of suitcases!


We spent a little time getting the living room somewhat more put together as well (since other than sleeping this is where we spend most of our time). We added feet to the tv stand to make it look a little less modern and fit with the style of the house a bit more. I have plans to also make doors for the front to conceal all the electronics (and wires that can be seen behind the stand). Something similar to a radiator cover since there is a vent behind the stand so heat needs a way to get through.


Then came the new coffee table. Or tables I should say. Our old table was just too big for the space. The new ones are two small square tables, that pushed together make a long rectangular one. They are distressed black metal with glass top and shelf (providing extra storage for things like the laptops). It's been so nice to have a table to put a glass on rather than the floor now!


And to add some fall decor (that I had been meaning to get to for a while), my pumpkin craft project! I spray painted cheap foam pumpkins from Michael's in copper, silver, and black. They add a nice little touch to the porch. Next year I think I might add a little straw or something to complete the look. Best part is that since they aren't jack-o-lanterns or orange and black, they can stay out through thanksgiving (when hopefully I will have some sort of winter decor to replace them with).


Of course we can't forget our first Halloween in the house passing out candy to trick or treaters! We ended up buying a little too much candy (we went through about 3 bags though). But as my mother taught me, it's better to have too much than not enough. Sadie also got dressed up in her pumpkin costume for the holiday.