Monday, February 25, 2013

Down Under, Part 2

Second stop on our trip was tropical Cairns, Australia.

We spent two days out on the water, snorkeling and diving the Great Barrier Reef. It was everything you see in pictures and movies, and even more. The colors were absolutely amazing. We saw tons of different fish, varieties of corals, reef sharks, turtles, and more. It was definitely one of the highlights of our trip. And something that cannot be accurately described by words.


The third of three days we had in Cairns was spent in the Australian rain forest and at the small village of Kuranda. We took the skyrail up over the tops of the trees to Kuranda. It made two stops along the way, which allowed us to walk through some areas of the rainforest.


Once we got to Kuranda, we got to see all sorts of Australian wildlife, from butterflies to kangaroos and wallabies to dingos and koalas and crocodiles and a cassowary. We even got to pet the kangaroos and wallabies, as well as hold a koala!


We then took the train back down to Cairns, with a quick photo op at Barron Gorge along the way.


Last stop on the trip: Sydney!

Wednesday, February 20, 2013

Down Under, Part 1

First, I'd like to thank everyone to voted for our picture on Facebook from the last post. We ended up in 2nd place, which won us $250!

It's been a while since my last post. This time I actually have a reason other than just being a slacker. We were on vacation! We spend 2 1/2 weeks traveling to New Zealand and Australia. Over the next few posts, I'll give you all a brief overview of our trip! Then back to the house stuff.

We started our trip in New Zealand on the north island. We visited Rotorua to see all the geothermal activity. It's similar to Yellowstone in the states. We also went to the Polynesian Spa and had mud wraps. Definitely a great treat after two days of flying/traveling.


Then we drove up to Auckland. We stayed at a friend of my mom's place (Thanks again Rhonda for the hospitality and showing us around!) Here's an early, foggy morning view from her house. Stunning, right?


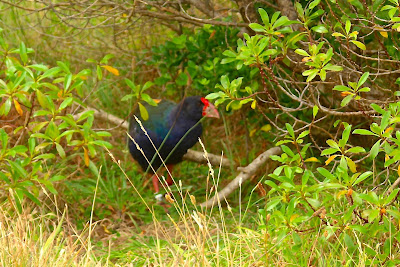
Our first day in the Auckland area, we took the ferry out to Tiritiri Matangi Island. It's a wildlife sanctuary island, that is even home to endangered Takahe. We hiked the island from about 10am to 4pm.


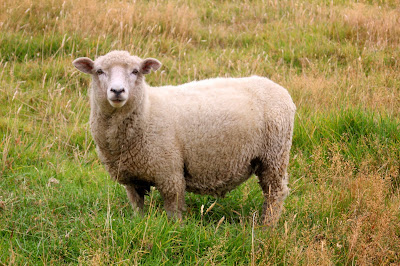
We then took the ferry back to Gulf Harbour. That evening we did some more light hiking around Shakespear Park. We saw the sunken ship at Okoromai Bay, a parent and baby endangered Dotterel, and of course token New Zealand sheep.


In our last day in New Zealand, we went to the Auckland museum. We started with the volcano exhibit, which has a neat simulator of a volcanic eruption near Auckland. We also spent a good amount of time in the Maori exhibit and seeing the Maori cultural show.


After the museum, we split with our wonderful tour guides and hosts. We went to the sky tower, while they spent a bit more time at the museum (It was a bit of an overcast day. Not the best day for the sky tower, but the only day we had). Luckily the cloud cover and fog had receded a bit allowing us to see from the top.


We were supposed to have a sunset kayak tour to Rangitoto that evening. But, unfortunately, it had to be cancelled due to weather. The winds (and waves) were just too high for it to be safe to kayak. As sad as we were about the cancellation, safety is always top priority. Better not to have done the tour than to spend the rest of our trip in the Auckland hospital.

There is plenty more to do on the north island, and we didn't even make it to the south island, but we feel pretty satisfied with what we got done in our time in New Zealand.

Next up: Cairns, Australia.

Wednesday, January 23, 2013

We Need You!

Cue picture of Uncle Sam.


I've posted a couple times about the new fencing we installed around our house. Well the company that makes the fencing is holding a Facebook photo contest, and we're a finalist!. What we need from everyone is to CLICK THIS LINK and like the picture of our fencing.

Winning this contest will help us continue our home improvements, so please tell all of your friends as well! The more likes we can get, the more likely we are to win!

THANKS EVERYONE!

Our contest entry! Like it on Facebook by using the link above!

Friday, November 23, 2012

Gobble Gobble

After just over a year in our first house, we decided to host our first Thanksgiving dinner. I always help my mom cook for holidays, so I wasn't super unfamiliar with cooking a big holiday dinner.

We had homemade green bean casserole, six cheese mashed potatoes, honey and bourbon glazed apples and sweet potatoes, cranberries, stuffing, challah rolls, and of course turkey and gravy. For dessert were mini pumpkin pies and mini apple pie cheesecakes.

That hardest part of the entire day, was trying to get everything cooked and done (and hot) at the same time. I actually had a surprising amount of down time that I was not too fond of having. It's hard to sit around when you know there is so much left to do.

But everything seemed to come together. And everyone said the food was delicious (who knows if they were really telling the truth...).

Our first turkey!

Hope everyone had a wonderful Thanksgiving! Now it's time to put up all the Christmas and Hanukah decorations. The bitter cold and flurries definitely make it feel a bit more like the holiday season.

Friday, November 2, 2012

Favorite Things: Clean Freak Edition

Yes. I'll admit it. I'm a bit of a clean freak. So in today's post I'm going to share a few of my favorite things.

First is our scooba. I've named ours Henry (I figure if it's going to clean my house, it should at least have a name). Now you're all going "what in the world is a scooba?" Well it's from iRobot, the makers of the roomba. Only unlike the roomba which is a vacuum, the scooba is essentially a robot mop. It is meant for hard surfaces, like our wood floors. You fill it up with a bit of floor cleaner (specific to your type of floor) and water, press a button, and off it goes. We have the 230 model, but there is a new 390 model that also vacuums small particles while mopping (so you don't even have to sweep before!) Best part, it makes a pretty amusing dog toy while it cleans your floors. 


My next new favorite cleaning thing is our washer/dryer. We have an all in one washer and dryer. Meaning you toss in the load of laundry, set the wash, set the dry, and let it go. I'm the type of person that puts a load of laundry into the wash and then start doing other things, and completely forget to move it to the dryer. An all in one machine is by far the best laundry invention for someone like myself. Not to mention it is amazing for those who work all day. The LG machine we have allows for you to set a delay and also has a cool down cycle after drying. When I worked full time, this was a life saver. It allowed me to throw in a load before going to work (or even the night before) and set it to go on about 2 in the afternoon. It would then wash and dry the load and be ready for folding when I walked in the door. And even if traffic was bad, the 4 hour cool down cycle kept the clothes from wrinkling. It even sings to you when it's done.


Now if you're not looking to spend a lot of money, here are some of my quick clean freak loves. 

I keep one of those Oxo squirt dish cleaners with a mixture of dish soap (like Dawn or Palmolive or whatever you like) and vinegar in my shower at all time. Before getting out of the shower, I real quick wipe the shower with the cleaner. It adds maybe 30 seconds to each shower, but it eliminates having to scrub the shower clean each week (or month or year, depending on your cleaning habits). And it actually keeps my shower looking cleaner than it ever did with weekly scrubbings. I keep a container of premixed dish soap and vinegar in my linen closet upstairs, and refill the cleaner once a week when I clean the rest of the bathroom.


Dryer sheets. I use these to dust everything. They leave a small film on surfaces which helps to prevent the dust from sticking (at least from what I've noticed). Meaning less dusting, which I'm sure everyone would like (really, who likes to dust?) It's the best for electronics that are basically magnets for dust. You can even rub dyer sheets on baseboards to help prevent dust build up on those. And if you own the wonderful washer dryer combo I talked about before, you might be like me and have an abundance of dryer sheets since they were bought at Sam's club that you'll never use again (no need for dryer sheets with that machine). Best part, no sprays or anything needed. And you get that great fresh laundry smell around your entire place!


And of course, what clean freak post would be complete without a cleaning wish list.

I'm slightly obsessed with finding the perfect vacuum for my house. I have a big upright vacuum. It works well. But it's a huge hassle to carry it up and down the stairs every week (or to get my husband to do). I also bought myself a stick vacuum (basically a dust buster attached to a stick so you can stand while using it). Which is fine for the hardwood floors, but doesn't work well for the rugs. But I think I found my perfect match. It is a handheld vacuum, but has the suction of an upright along with a spinning brush. It combines the best of both of my current vacuums. Light enough to go up and down stairs easily, but powerful enough to get those rugs clean. I know "they" always say you're not supposed to give women vacuums as gifts, but I would be pretty excited to get this one. 


Interested in any of my clean freak items? Just click the pictures! The pictures will link you to where to buy them!

Wednesday, October 24, 2012

A Bit Of Privacy

I wrote earlier about installing our front fence and that we had one for the back sitting in the garage waiting to be installed. Well, it's finally done!

Like the front fence, we used a WamBam product. Only this time we went with a 6ft, semi-privacy, white vinyl fence. We decided to go this route to give us a bit of privacy in our back yard, to block the view to our yard from the street and near by condo building a bit more. But we didn't want to completely close off the yard, which is why we decided on semi-privacy rather than a solid fence. The panels have small gaps between each slat, allowing light (and wind) through, but are still small enough to give the sense of enclosure and privacy. 

Once again it took a full day and six people to get the fence installed. Our handy, dandy contractors found a drill bit that would allow us to drill into the soil (and through all of the crazy roots in the yard) which made installation a whole lot simpler. 

The fence was installed pretty much the same way as the front fence. Anchors into the ground, post covers, and panels. Once the anchors were in, the installation was pretty simple. And I'd assume that installing the anchors might be easier if the soil was a little less disagreeable than ours is. Hence the use of a 3ft drill bit.


Somehow, the addition of a privacy fence actually makes our yard feel bigger (at least to us). And it checks another box off the backyard to do list. But with it being fall, and winter approaching (hopefully not too quickly), the rest of the projects will probably have to wait until spring.

Tuesday, October 9, 2012

The Wall

Since living in our apartment, I have had numerous comments about "the wall". Well everyone is in luck! We're decided to do something similar in our bedroom in the new house and I'm going to dedicate this post to showing everyone how it was done!

Reminder, the wall in our apartment:

Yes I did paint around bookshelves, hence the giant white space
Start by painting the walls the color you want the lines between the blocks to be. In the case of our apartment we wanted white so we skipped this step. In our bedroom we went with a tealish-blue color (it's almost Tiffany blue for the ladies to get a better idea since pictures and computer screens sometimes distort colors).

Next is to tape off the pattern. This is where you let your creativity shine (or where you call in your artsy mother to help because being an engineer you don't do random super well). Start putting tape up in squares and rectangles of all different sizes. We tried to avoid having a line that connected more than three boxes. This helped to keep the look less predictable. For the apartment I started by taping horizontal and vertical lines using a lot of measuring and a hand level (to make kind of a plaid) and then removed and added tape to make it random. In our bedroom I invested in a laser level that showed both vertical and horizontal level and skipped the plaid step. The entire bedroom took far less time to do than the single wall in our apartment, so I would highly advise the laser level.


Final step is to paint! Just like stripes, don't use too much paint on your brush and start with the brush on the tape and pull onto the wall rather than the opposite way. This will help prevent bleeding under the tape. If you are going with more than one color, I suggest opening all the colors and use your finger dipped in the paint to mark which block will be which color before painting the entire wall. This will help avoid the inevitable multiple blocks of the same color next to each other.

Then just pull the tape off the wall and touch up any bleeding there may be!